CagriSema Research: Combining Cagrilintide and Semaglutide Dosing
CagriSema is Novo Nordisk’s investigational fixed-dose combination of cagrilintide 2.4


Many people wonder how to reconstitute lyophilized peptides with bacteriostatic water. It might appear tricky, but it’s easy to handle. When conducting research, it’s crucial to mix peptides properly. This ensures accurate results and protects the peptide’s quality.
At Ignite Peptides, we’re committed to helping researchers get accurate results. We provide high-purity peptides that go through strict third-party testing.
Use this guide to walk through each step.
Lyophilized peptides are freeze-dried powders. They look like tiny piles of white crystals in small vials. Companies ship peptides this way because it keeps them stable for longer periods. The powder lasts longer than the liquid.
But before you can use the peptide in research, you have to turn that powder into a liquid. That process is called reconstitution.
To reconstitute lyophilized peptides, you need a clean liquid. The best choice is bacteriostatic water. It contains a small amount of benzyl alcohol to keep it germ-free. The alcohol keeps bacteria from growing.
This is important because peptides often sit in the fridge for a few weeks after mixing. Using bacteriostatic water helps the peptide remain effective longer.
If you use plain sterile water, the peptide may only stay safe for a day or two. Bacteriostatic water helps protect both the peptide and your research. For a detailed comparison, see our guide on Bacteriostatic Water vs Sterile Water.
Here’s what you’ll need:
Keeping your supplies clean is very important. Dirty tools can ruin your peptide.

Let’s go through how to reconstitute lyophilized peptides with bacteriostatic water in simple steps.
Wash your hands well. Wipe your table or countertop with alcohol. Ensure your workspace is tidy and dry. This prevents germs from getting into your peptide vial.
Take off the plastic caps from both vials. Clean the rubber stoppers with an alcohol swab. This ensures any bacteria on the vial tops are eliminated.
Put the needle into the bacteriostatic water vial. Draw the amount of water you need. Many people use 1 to 3 millilitres. It varies based on the strength you want for your peptide solution.
Measure carefully so your dose will be correct.
Stick the needle into the vial’s rubber top. Slowly push the water into the vial. Add water slowly, letting it run down the side of the vial.
Don’t squirt water right onto the powder. Pouring too quickly can cause bubbles or damage the delicate peptide.
Hold the vial and swirl it gently. Please don’t shake it hard. Shaking can create foam and break the peptide’s structure.
If the powder does not dissolve right away, let it sit for a minute or two. Swirl it again gently. Continue mixing until it looks clear.
Use a marker or label to write:
Then, put the vial in the fridge. Store it at 2-8 °C. Most mixed peptides are good for about 2 to 4 weeks.
Let’s go through how to reconstitute lyophilized peptides with bacteriostatic water in simple steps.
For a complete guide with additional tips, see how to reconstitute peptides correctly.
Knowing your peptide concentration is important for research. Here’s how to figure it out.
Use this simple math:
Calculate the concentration in mg/mL by dividing the peptide’s weight (mg) by the water volume (mL).
Assume there are 10 mg of peptide powder in the vial. Add 2 mL of bacteriostatic water.
10 divided by 2 equals 5. So, the concentration is 5 mg/mL.
If you need a 2 mg dose:
2 mg ÷ 5 mg/mL = 0.4 mL. For that dose, you’d withdraw 0.4 mL from the vial.
| Peptide | Water | Concentration |
| 5 mg | 1 mL | 5.0 mg/mL |
| 5 mg | 2 mL | 2.5 mg/mL |
| 10 mg | 2 mL | 5.0 mg/mL |
| 10 mg | 4 mL | 2.5 mg/mL |
This chart makes it easier to plan your mixing.

When learning how to reconstitute lyophilized peptides with bacteriostatic water, try not to make these common mistakes:
Following the right steps protects your peptide and ensures accurate research results.
Reconstituting peptides correctly keeps them safe and usable for your research. It helps your peptide:
If you mix it wrong, you could waste your peptide and get poor results in your research.
For a closer look at when to use sterile water instead, check out our article on Bacteriostatic vs Sterile Water.
At Ignite Peptides, researchers deserve absolute confidence in the compounds they use. That’s why we work only with manufacturers certified under ISO 9001:2015 and GMP standards. Every product goes through rigorous third-party testing to ensure over 99% purity. Our goal is to support scientists with reliable, high-quality peptides they can trust for precise results.
Now you know how to mix peptides with bacteriostatic water. It’s easy if you follow the steps. Keep everything clean. Measure carefully. Label your vials. Peptides should be stored in the fridge at all times.
Taking time to mix peptides properly helps protect your research and your results. Have a question? Just get in touch with Ignite Peptide. We’re here to help you succeed. For high-quality, lab-tested peptides, visit Peptide Store to browse lab-tested peptides and more.
Yes, but only if you plan to use all of the peptides right away. Sterile water doesn’t have preservatives, so bacteria can grow quickly.
Mixed peptides often last two to four weeks when kept in the fridge. Check your supplier’s instructions to be sure.
Let it sit at room temperature for a few minutes. Swirl gently again. If it still won’t dissolve, contact your peptide supplier.
Shaking can create bubbles and damage the peptide. Swirl gently instead.
To reconstitute peptides, add the right amount of bacteriostatic water or sterile water to the powder. Swirl the vial gently until the powder has completely dissolved. Do not shake. Always follow your supplier’s instructions.
Yes. Most reconstituted peptides should be kept in the fridge to stay stable. Lyophilized (dry) peptides can last longer at room temperature, but refrigeration is usually recommended.
Use bacteriostatic water for most peptides. Some may also be mixed with sterile water if you plan to use them immediately. Avoid alcohol or other liquids unless your supplier specifically recommends it.
Always add the liquid slowly, drop by drop if needed. Swirl gently to mix, never shake. Make sure the powder fully dissolves before using. Proper reconstitution helps maintain the peptide’s effectiveness.
The amount depends on the peptide and the dose you plan to use. Check the supplier’s instructions carefully. Using too much water can dilute the peptide, while too little can make it hard to dissolve.
Bacteriostatic water is usually preferred because it contains a preservative that prevents bacterial growth. Sterile water can work if you use the peptide right away. Avoid tap water or alcohol unless instructed.
Disclaimer: This content is for research and informational use only. Peptides are not approved for human use. Always follow legal and safety guidelines.
CagriSema is Novo Nordisk’s investigational fixed-dose combination of cagrilintide 2.4
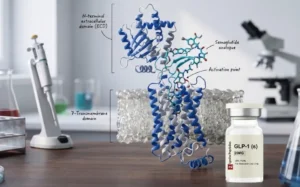
Semaglutide is one of the most studied GLP-1 receptor agonists
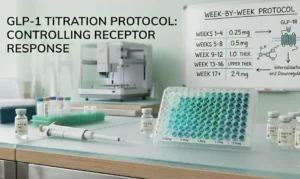
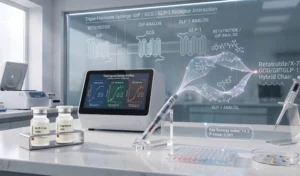
Introduction Designing a precise GLP-1 titration schedule is one of
Introduction Research on the GLP-1 mechanism is one of the